Monday, April 15, 2013

Sesame Salmon


A few posts back I shared a recipe (Chicken Tikka Masala) from Club House's spice packs that are
available in grocery stores. We liked the ease of the spice pack so much that we decided to try another one - Asian Sesame Salmon.

Here are the spices that the included in the pack:
  • 2 tsp McCormick Gourmet Sesame Seeds
  • 1 tsp Club House Dehydrated Minced Garlic
  • 1 tsp Club House Dehydrated Minced Onion
  • 3/4 tsp Club House Ground Ginger
  • 1/2 tsp Club House Crushed Red Pepper
And here are the ingredients that you will need to add:
  • 1/3 cup Belly Bee Honey
  • 1/3 cup thinly sliced green onions
  • 2 tbsp soy sauce
  • 2 lb salmon fillets
 And this is how the recipe suggests you bring it all together:
  1. In a small bowl, combine the honey, green onions, soy sauce and spices, except red pepper, until well blended. Stir in red pepper to taste, if desired. Place salmon in 13" x 9" baking dish. Spoon honey mixture evenly over salmon.
  2. Bake salmon in preheated 375F oven for 30 minutes or until the salmon flakes easily with a fork, basting occasionally with honey mixture.
This recipe was VERY simple and one that I probably will not bother buying the spice pack for again, now that I have the recipe (the recipe is kept in the inside of the package) and because I have all of the supplied spices already in my kitchen. My only improvement to the recipe would be to let the salmon marinate in the honey mixture for several hours in the fridge, or even overnight. However, if you are looking for a quick and healthy meal try this exact recipe - I know you'll enjoy it!

Bon appetite & enjoy!

Friday, April 12, 2013

2013 Easter Dinner

Easter dinner has become the holiday meal hosted by the Richey/Larkin residence now for two years
- and we love it! Last year was our first attempt at a formal dinner for our guests and although it was a stressful first time experience, we did learn a lot and were able to better prepare for the dinner this year.

Steve and I decided to keep several menu choices the same as last year because everyone seemed to really enjoy them, but we did decide on a few new dishes (all of the recipes have their links below).

Here is what we made for dinner:
And for dessert we made Creme Brule!


This year I also decided to stop into Sweet Janes
in downtown Halifax for a few Easter treats at everyone's place - it was a great surprise for everyone and a nice way to help decorate the table.


Notes from dinner:
  • Steve takes care of preparing, cooking and carving of the Easter ham. And he does a great job! Our ham this year was delicious and juicy!
  • The green bean casserole has turned into my brother's favorite dish we make! I made this dish last year as well and felt that it would be best to use the cream of chicken (instead of the cream of mushroom) to ensure that everyone around the table would like it - I do not like mushrooms!
  • My Dad loves sweet potatoes, so we decided to make the sweet potato dish again. It continues to amaze me just how much the chives and the cream cheese enhance this dish
  • I regularly refer to the Inspired Magazine (from Sobeys) for recipe ideas, especially for holidays. And this year I loved that they had a full Easter menu planned out - so I decided to try two of their dishes: Glazed Rainbow Carrots and Lemon Parmesan Broccoli. Both of these recipes were great and added lots of color to the menu. At first several of our guests were not sure what to think of the Rainbow carrots but eventually came around to them and loved them! The only mistake that I made to the entire dinner was adding a bit too much lemon to the Lemon Parmesan Broccoli (I decided to half the recipe, but forgot to half the lemon needed - so needless to say there were some sour faces around the table).
  • The creme brule was a new adventure to me. It was my first time making a custard and using the mini blow torch (Steve had bought it for me for Christmas!). I decided to pre-make the creme brule the night before and let them sit in the fridge over night. About an hour before we were going to eat them, I sprinkled on the brown sugar and perfectly torched them. The final product was deliciously sweet and creamy!
Overall we had a wonderful time hosting Easter dinner again at our home! Thank you to our guests who made it all worth it!

Bon appetite & enjoy!

Monday, April 8, 2013

Cheese Snacks


For Easter this year I decided to put out a light snack as our guests arrived - something to nibble on while they watched golf!

A few weeks back while I was grocery shopping I noticed a small 'All You Need is Cheese' magazine on a stand in the dairy section. I took a quick read through the magazine at the time and thought that I may be interested in putting together a few of these snacks for a future gathering - and it worked out that Easter was the perfect time!

I decided to use two of the recipes from the magazine (also listed online):
  1. Stacked Veggies & Havarti
  2. Roasted Bell Pepper Bruschetta with Jalapeno Havarti
I used Foxhill Cheese for both of the recipes, and chose to use Foxhill's jalapeno Gouda in place of the jalapeno Havarti for the second recipe.

These were simple, tasty and crowd pleasing treats to have before Easter dinner this year - everyone loved them!

Give them a try next time you need a quick snack to serve.

Bon appetite & enjoy!

Friday, April 5, 2013

Chicken Tikka Masala


Steve and I both love Indian food! So when we came across a simple spice pack for Chicken Tikka Masala from Club House in the grocery store we decided to give it a try.

The spice pack was inexpensive and provided us with all of the spices and their required quantities that we would need (so this did save us a small amount of time). The pack came with:
  • 2 tsp Club House paprika
  • 1 tsp Club House dehydrated minced garlic
  • 1 tsp McCormick gourmet garam masala
  • 1/2 tsp Club House ground cumin
  • 1/2 tsp Club House crushed red pepper
The ingredients that we needed to provide were:
  •  2 tbsp butter
  • 1 1/2 lb boneless, skinless chicken breast cut into 2cm cubes
  • 1 cup chopped onion
  • 2 tbsp lemon juice
  • 1 can diced tomatoes
  • 1/3 cup whipping cream
  • 1 1/2 tbsp cornstarch
  • 1/2 tsp salt
And here is how you bring it all together:
  1. In a large skillet, melt the butter over medium heat. Add chicken, onion and lemon juice. Saute for 10 minutes. Stir in all spices, except red pepper. Simmer for one minute, stirring constantly.
  2. Stir in tomatoes until well mixed. Combine cream, cornstarch and salt. Gradually stir in tomato mixture. Stir in red pepper, to taste. Bring to boil. Reduce heat to low; simmer for 5 minutes or until thickened, stirring frequently.
  3. Serve with cooked basmati rice or naan bread.
Overall the recipe was simple and tasted great. However, Steve and I both noticed how similar this recipe was to past butter chicken dishes that we have made. After doing some research I found that these two dishes do tend to be similar, the main difference is the butter chicken is made with a heavier cream and more butter (good to know!).

Next time you are walking through the spice aisle at your grocery store, take a minute to look at the spice packs that Club House has to see if any may interest you (especially if they are on sale!). It also gives you a good opportunity to try a few new spices, without having to buy the whole bottle.

Bon appetite & enjoy!

Monday, April 1, 2013

Turkey & Bean Burritos


Burritos can be a great way to mix together lots of your favorite tastes while also making a good attempt to eat relatively healthy. You are able to get in at least one serving from all of the food guide's food groups (grains, vegetables, dairy and protein) while really enjoying your meal!

When Steve and I are not adventuring to Eastern Passage for some of Habarneros' famous burritos we are at home making our own (ours do not rival Habarneros at all, but we still enjoy them).

We recently came across a recipe for turkey and bean burritos in our Better Homes & Gardens: every meal easy cookbook. So we gave the recipe a try and we really liked it. Below are the ingredients and the recipe so that you can enjoy them too!

Here are the ingredients you will need:
  • 8 8" flour tortillas
  • 12 ounces uncooked ground turkey
  • 1 cup chopped onion (we used one small yellow onion)
  • 2 cloves garlic, minced
  • 1 15 ounce can black beans or pinto beans, rinsed & drained (we used black beans)
  • 1/2 cup salsa
  • 2 teaspoons chili powder
  • 1/4 cup shredded cheddar cheese
  • 1/4 cup shredded lettuce
  • Salsa (additional salsa for dipping, etc is optional)
  • Sour Cream (optional)
And here are the steps to bring it all together:
  1. Preheat oven to 350F. Stack tortillas; wrap in tin foil. Heat in the oven for 10 minutes to soften.
  2. Meanwhile, for filling, in a large skillet, cook turkey, onion and garlic over medium heat until meat is brown and onion is tender. Drain off fat. Stir in beans, the 1/2 cup salsa and the chili powder. Heat through.
  3. Spoon about 1/3 cup of the filling onto each tortilla and top each with 1 tablespoon cheese and 1 tablespoon lettuce. Fold bottom edge up and over filling, just until covered. Roll up, tucking in sides. If desired, serve burritos with additional salsa and sour cream.
This recipe made approximately 8 burritos! So come hungry or have friends over for dinner!
Next time I would like to add some guacamole and some refried rice to mine - so of course this recipe is also on our 'must try again recipes' list.

Give this one a try and share with us what you added to yours!

Bon appetite & enjoy!

Friday, March 29, 2013

Parmesan Chicken & Broccoli

In the heart of winter, who doesn't love a rich, creamy delicious casserole?!


The other week it was Steve's turn to pick our weekly recipes and he came across a perfect winter casserole dish from the Better Homes & Gardens: every meal easy cookbook - 'Parmesan Chicken & Broccoli'.

Here are all of the ingredients that we used for the recipe:
  • 1 cup rice (we used instant rice and used 2 cups)
  • 1/2 cup sliced green onions (4)
  • 12 ounces skinless, boneless chicken breast halves, cut into strips
  • 3/4 teaspoon dried Italian seasoning, crushed
  • 1 clove garlic, minced
  • 1 tablespoon cooking oil
  • 1 16 ounce jar reduced far Alfredo sauce
  • 3 cups frozen broccoli (we used fresh)
  • 1/3 cup grated Parmesan cheese
  • 1/4 diced cooked ham (we chose to not use the ham)
  • 1 2 ounce jar diced pimientos, drained (we chose not to use the pimientos)
  • Ground black pepper
And here is how we brought it all together:
  1. Preheat the oven to 350F. Cook rice according to package directions; remove from heat and stir in half the green onion. Divide rice mixture among four 12 ounce individual au gratin dishes or casseroles (we chose to just use one medium casserole dish); set aside.
  2. In a large skillet, cook the chicken strips, Italian seasoning, and garlic in hot oil over medium heat for 4 to 6 minutes or until the chicken is no longer pink. Remove from heat. Stir in Alfredo sauce, broccoli, cheese, ham and pimientos (if using). Season to taste with ground black pepper. Spoon chicken mixture over the rice. Bake, covered for 15 minutes. Uncover and bake for 15 minutes or more until heated through. Then add the remaining green onion to the top.
The recipe is intended to make 4 servings; however, for us it made about 6 servings because we used the medium casserole dish and used more rice.
This was a very easy and tasty dish to try - we have added it to our list of 'must try again recipes' and will be adding in more vegetables next time too!

Give this one a try when you need a good warm wintery meal, but need something other than beef and potatoes!

Bon appetite & enjoy!

Monday, March 25, 2013

Cranberry Pound Cake


My Dad LOVES cranberries!

So naturally when he came across a Cranberry Pound Cake recipe in his monthly Downhome magazine he passed it along to me and asked me to make it 'when I had some time' aka make this now!

The first time that I made this recipe was around Christmas time, as a 'surprise' for my Dad on Christmas Day. The recipe was very easy to follow and left everyone who was able to enjoy it with smiling faces (the best part of any creation is seeing people enjoy it!). However, the one thing that the recipe did not inform me of is that it could actually make enough batter to fill two bread pans - something I had a learn the hard way (I stepped away from the oven as it was baking and the loaf began to overflow into the bottom of my oven..).

The second time that I made this recipe was in February just after Valentines Day (soon after I had another call from my Dad informing me that he and his friend enjoyed it so much that they wanted more 'when I had some time' aka make this now!). This time I tried to see just how much the loaf would rise on its own - this lead me to make two loaves that were slightly uneven. Next time I will simply just split the batter in half and make good medium size loaves.

If you know someone who really enjoys cranberries in baked goods then I urge you to try this recipe - it is simple to make and delicious to eat!

Bon appetite & enjoy!

Friday, March 22, 2013

Chicken Burgers with Sundried Tomato Aioli & Sweet Potato Fries


We are trying to not let the winter weather get us down! So every now and again we will opt for recipes that we would typically make in the summer months (on the BBQ!).

To make this dinner we used two different recipes (one for the burgers, one for the fries) but both were from the 'Cook This Not That' cookbook series (... of course they are...).

The ingredients that you will need for the chicken burger recipe are:

2 tbsp olive oil mayonnaise
2 tbsp chopped sun dried tomatoes
Juice of 1/2 lemon
2 cloves garlic, finely minced
1 tsp chopped fresh rosemary
Salt and pepper to taste
1 lb lean ground chicken
4 whole wheat or potato buns or English muffins, split
2 cups arugula, baby spinach or mixed greens

And here is how you bring the burgers all together:
  1. In a mixing bowl, combine the mayonnaise, sun dried tomatoes, lemon juice, garlic and rosemary. Season with a pinch of salt and black pepper. Set the aioli aside.
  2. Preheat a grill, grill pan or cast iron skillet. Combine the ground chicken with 1/2 teaspoon salt and 1/2 teaspoon black pepper and mix gently. Without overworking the meat, form into four patties until the chicken just comes together.
  3. When the grill or skillet is hot (if using a skillet, add a touch of oil), add the burgers. Cook on the first side for 5-6 minutes, until a nice crust develops. Flip and cook for another 3-4 minutes, until the burgers are firm but ever so  slightly yielding to the touch and cooked through. Remove the burgers. While the grill or pan is hot, toast the buns.
  4. Layer the bottom buns with the arugula, top each with a burger, then slather the aioli over the top of each. Crown with the bun tops and serve.
This recipe was OK but the burgers needed to be made juicier. If I make these again I will add in some of the aioli to the burger mixture. I will also add a peppery cheddar cheese to help add some more flavour. And perhaps even a few sesame seeds on the top to finish it all off.

To make the sweet potato fries Steve was finally able to use his french fry cutter that was in his stocking at Christmas - thanks Santa!


After having lots of fun cutting the sweet potatoes with his new gadget, Steve spread out the fries on a baking sheet, drizzled them with oil, added salt and pepper to taste and then they went in the oven for 25 minutes at 350F. These sweet potato fries were great!

If you give the chicken burger recipe a try please let me know and let me know if you change anything to make it better!

The Chicken Burger with Sun Dried Tomato recipe was from the 'Cook This Not That: Easy & Awesome 350 Calorie Meals'. The Sweet Potato Fries recipe was adapted from the 'Cook This Not That: Easy & Awesome 350 Calorie Meals' cookbook.

Bon appetite & enjoy!

Monday, March 18, 2013

Sesame Noodles with Chicken & Peanuts


Keeping with the theme of cooking recipes from our 'Cook This Not That: Easy & Awesome 350 Calorie Meals' cookbook, this recipe for 'Sesame Noodles with Chicken and Peanuts' is also from that cookbook (I think that you can tell how much we like these books!).

Here are the ingredients that the cookbook suggests you use:

6 ounces whole wheat fettuccine
2 tsp toasted sesame oil, plus more for noodles (I am a big fan of sesame oil!)
Juice of 1 lime
2 tbsp warm water
1 1/2 tbsp chunky peanut butter
1 1/2 tbsp low-sodium soy sauce
2 tsp chili sauce, such as sriracha (we used sriracha)
2 cups shredded chicken
1 red or yellow bell pepper, sliced
2 cups sugar snap peas
1 cup cooked and shelled edamame (optional - we didn't use it)
Chopped peanuts, sesame seeds, or chopped scallions (optional)

And here is how you bring it all together:
  1. Bring a large pot of salted water to boil and cook the pasta according to package instructions. Drain the pasta and toss in a large bowl with a bit of sesame oil and rice wine vinegar to keep the noodles from sticking.
  2. Combine the lime juice, water, peanut butter, soy sauce, chili sauce, and sesame oil in a microwave-safe mixing bowl. Microwave for 45 seconds, then stir to create a uniform sauce.
  3. Add the sauce to the noodles and toss to mix. Site in the chicken, bell peppers, sugar snap peas, and edamame (if using). Top individual servings with peanuts, sesame seeds, and scallions if you like.
I loved this recipe! It was a fun way to add peanut butter to a simple recipe and to have a new flavour! And I was very impressed to see how well the sesame oil and rice wine vinegar kept the noodles from sticking together - I will definitely use that tip in lots of my noodle dishes from now on.

Give this recipe a try the next time you are looking for a way to kick up your basic noodles.

Bon appetite & enjoy!

Friday, March 15, 2013

Beef with Broccoli


One of our go-to quick weeknight recipes is always beef and broccoli, and usually we would just use a store bought sauce for the dish. However, in our 'Cook This Not That: Skinny Comfort Foods' cookbook we noticed that they had a recipe which includes making your own sauce for beef and broccoli, so naturally we wanted to give it a try to see if it would be better than what we could buy in the store.

Here are the ingredients that the cookbook suggests that you use:

3 tbsp low-sodium soy sauce
3 tbsp oyster sauce (this was our first time using oyster sauce in our own cooking!)
2 tbsp Shaoxing rice wine, sherry, or dry white wine (we used sherry)
1 tbsp brown sugar
1 tsp toasted sesame oil (we love this oil!)
1 tsp cornstarch
1 lb flank steak, thinly sliced
1/2 tbsp canola or peanut oil (we used canola oil)
1 lb broccoli, broken into bite size pieces
1 red or yellow bell pepper, cored and sliced
4 cloves garlic, minced
1 tbsp grated fresh ginger
1/4 cup low-sodium beef stock

And here is how the cookbook suggests that you bring it all together:
  1. Combine the soy sauce, oyster sauce, Shaoxing (sherry), brown sugar, sesame oil and cornstarch in a large mixing bowl. Whisk to combine the liquid with the cornstarch. Mix in the beef and let marinate for 30 minutes.
  2. Heat the oil in a wok over medium heat. Add the broccoli, bell pepper, garlic and ginger and stir-fry, using a spatula to keep the vegetables moving, for about 5 minutes, until the vegetables have softened. Add the beef and its marinade and continue cooking, stirring frequently, for about 5 minutes, until the beef is browned and nearly cooked through. Add the stock and cook for another 2 minutes, until the sauce thickens and clings to the beef and vegetables. Serve over steamed brown rice, if you like.
This recipe was OK but it the sauce (the key element of this recipe) did not meet our expectations (which were to exceed the sauces we could buy in the grocery store). So we will probably continue to buy our beef and broccoli sauces from the grocery store - unless we want to expand off of this recipe and see what other creations we can come up from.

If you try this recipe please let us know your thoughts!

Bon appetite & enjoy!

Monday, March 11, 2013

Garlic-Rosemary Roast Beef & Roasted Garlic Mashed Potatoes


I love having a hearty roast beef dinner on a Sunday night! But because Steve and I are so busy (and we like to try so many new recipes) it is actually rare for us to make a roast beef dinner on a Sunday night. However, when we do make it we like to make it with garlic - so it was very fitting that we found garlic infused recipes in our 'Cook This Not That' cookbooks!

Here are the ingredients you will need for the Garlic-Rosemary Roast Beef:

3lb rump roast
8 garlic cloves, peeled
2 tbsp olive oil
1/2 tbsp chopped, fresh, rosemary
Salt and pepper to taste

And here is how you need to bring the roast all together:
  1.  Remove the roast from the fridge at least 30 minutes before cooking.
  2. Preheat oven to 250 deg F. Use a small paring knife to make small incisions into the roast and gently insert garlic clove halves all over. Rub the roast with the olive oil and season all over with rosemary, salt and pepper. Place on a rack on a baking sheet and place on the middle rack of the oven.
  3. Roast for 90 minutes. Turn up heat to 475 deg F and roast for another 15 minutes, until a deep brown crust had developed and a thermometer in the thickest part of the meat reads 140 deg F.

Here are the ingredients that you will need for the Roasted Garlic Mashed Potatoes:

1 1/2 lbs Yukon gold potatoes
1 cup low fat milk
1 tbsp butter
6 cloves roasted garlic
Salt and pepper to taste

And here is how you will bring the mashed potatoes all together:
  1.  Place potatoes in a large pot of salted water and bring too boil. Cook until a knife inserted into the flesh meets no resistance, about 25 minutes. Drain.
  2. While the potatoes boil combine milk, butter and garlic in small saucepan and heat until butter is melted. Keep warm.
  3. Mash potatoes into a rough purée. Slowly add hot milk mixture to the potatoes using a wooden spoon to beat continuously. Season with salt and pepper.
Overall the combination of these two recipes were great (especially if you like garlic!). I am sure that we will be using these recipes and elements of these recipes for many years to come!

The Garlic-Rosemary Roast Beef is from the 'Cook This Not That: Skinny Comfort Foods' cookbook.
The Roasted Garlic Mashed Potatoes are from the 'Cook This Not That: Easy & Awesome 350-Calorie Meals' cookbook.

Bon appetite & enjoy!

Friday, March 8, 2013

Classic Risotto with Authentic Italian Flavours - Chef Michael Smith


Until recently, neither Steve nor I had never made our own risotto. It was not until we went to the Halifax Club for their Piemonte Wine Dinner that I had a risotto so good I wanted to learn to make it at home - so that I could eat it whenever I wanted.

I am also a big fan of Chef Michael Smith's recipes and his cooking shows - so when I was looking for a great risotto recipe for me to try - his recipes were the first place that I looked. I wanted to start with a simple risotto recipe, so I was delighted to see a classic Italian risotto recipe on his Food Network webpage.

Here are the ingredients that Chef Michael Smith suggests you use for his Classic Risotto with Authentic Italian Flavours:

2 tablespoons extra virgin olive oil
1 onion, chopped
4 cloves garlic, minced
2 cups Arborio rice
1 cup Italian white wine
8 cups real chicken broth, simmering hot
1 cup good quality Parmigiano-Reggiano cheese, shredded
1 tablespoon (or so) of butter
a few sprigs of fresh thyme or any fresh herb, minced

 And here is how Chef Michael Smith suggests you bring it all together: 
  1. Lightly simmer the chicken broth in one pot as you make the risotto in another pot.
  2. Splash the oil into a medium saucepan over medium-high heat, then toss in the onions and garlic and sauté quickly until golden and fragrant, a few minutes. Add the rice and continue to cook and stir over medium high heat, coating the grains evenly with the oil, until the rice grains give off a toasty aroma and transform from pure white to almost entirely opaque.
  3. Splash in the white wine and stir frequently as the rice quickly absorbs the liquid. Reduce your heat to low. Start adding the hot chicken stock in several additions, stirring frequently after each one and allowing the rice to absorb the broth. Continue to cook and stir the risotto until the rice is just tender or al dente (soft with an ever so slight bite to the center) and creamy. The Arborio rice will gradually release its starch and thicken the extra liquid into creaminess. Creamy is important if you’re going for authenticity! This will take about 20 minutes from when you start adding the liquid.
  4. To finish stir in the Parmesan, butter and minced fresh thyme. Spoon into dishes piping hot and share.
This recipe was easy to follow (he has a great ability of fully explaining each step in the process) and the final product was delicious! This recipe is going straight to the top of dishes that I want to make again!

Definitely give this one a try!

Bon appetite & enjoy!

Monday, March 4, 2013

Kung Pao Chicken


We all know that sometimes chicken can be a little bit.... boring! So we like to find all kinds of ways to spice it up - sometimes literally! As you will remember, we love the 'Cook This Not That' cookbooks and for Christmas Steve received two new books from this series. Many of the recent recipes we have posted to our blog were from the 'Cook This Not That: Easy & Awesome 350 Calorie Meals'; however, this recipe for 'Kung Pao Chicken' is from the 'Cook This Not That: Skinny Comfort Foods' cookbook.

This recipe definitely delivered on its ability to add some flavour and spice to the chicken, but I would not agree that this dish is a comfort food - a little too spicy for my liking!

Here are the ingredients that you will need for this recipe:

1 lb boneless, skinless chicken thighs, diced (we used chicken breasts because they were on sale)
1/4 cup rice wine or sherry (we used sherry)
1/4 cup low sodium chicken stock
2 tbsp soy sauce
1 tbsp balsamic vinegar
1/2 tbsp sugar
1 tsp cornstarch
1 tsp sriracha or other Asian chili sauce (we used sriracha)
1 tbsp peanut or canola oil (we used canola oil)
4 dried red chilies or 1 tsp red pepper flakes (we used the red pepper flakes)
4 scallions, chopped, white and green parts separated
3 cloves garlic, minced
1 tbsp mined, fresh ginger
1 large zucchini, diced
1 red bell pepper, diced
1/4 cup roasted peanuts

And here is how we brought it all together:
  1. Combine the chicken, rice wine, stock, soy sauce, balsamic, sugar, cornstarch, and sriracha in a large bowl. Cover and marinate for 30 minutes, or up to 2 hours in the fridge.
  2. Heat the oil in a wok over medium-high heat. Add the chilies, scallion white parts, garlic, and ginger and stir-fry for 30 seconds, until fragrant but not browned. Add the zucchini and bell pepper and continue cooking, using a metal spatula to keep the ingredients in near-constant motion, for about 3 minutes, until the vegetables are lightly browned.
  3. Remove the chicken from the marinate and add to the wok, stir-frying for about 3 minutes, until lightly browned on the outside. Add the marinade and peanuts and cook for 3 minutes longer, until the liquid comes to a boil and begins to thicken and cling to the chicken an vegetables. Stir in the scallion greens and serve over a small scoop of steamed brown rice, if you like.
As I mentioned above, this recipe was a little too spicy for me, so if we do decide to make it again we will make sure to cut back on the red pepper flakes!

Give this recipe a try and let me know what you think about it!

Bon appetite & enjoy!

Friday, March 1, 2013

Margarita Chicken


Over the past few months we have been trying out recipes that have black beans in them - Steve really likes black beans and they are a nice way to add in another texture to a lot of dishes. In our new 'Cook This Not That: Easy & Awesome 350 Calorie Meals' cookbook there was a recipe for Margarita Chicken (which included black beans) so naturally we wanted to give it a try.

Here are the ingredients that you'll need for this recipe:

1/2 can black beans (14-16 oz) drained
1/4 tsp cumin
Juice of 1 lime
Salt and pepper to taste
1/2 tbsp canola oil
4 boneless, skinless chicken breasts
1 cup prepared salsa
1 cup pepper jack cheese
Chopped cilantro

Here is how we brought it all together:
  1. Preheat oven to 450 deg F. Combine black beans and cumin on a saucepan and heat all the way through. Squeeze in the lime juice and season with salt and pepper. Remove from heat and warm before serving.
  2. Heat the oil in a large skillet over medium-high heat. Season the chicken all over with salt and pepper and sear in a hot pan for 3-4 minutes on the first side, until a nice crust develops, then flip. Cook for another 3-4 minutes,then spoon the salsa over the meat, top with cheese and place in oven. Bake until the chicken is cooked through and the cheese is fully melted, no more than 5 minutes. Divide the beans among all of the plates and top with chicken and garnish with cilantro.
This dish was OK but was not something that I would be jumping at to try again. Given that most of the flavour is coming from the salsa you really need to make sure that you are using a salsa that has a full flavour to it.

If you try this recipe please let me know how it worked out for you and if there were any substitutions that you made.

Bon appetite & enjoy!

Monday, February 25, 2013

Greek Salad


I am a big fan of Greek food, and since the Greek Festival here in Halifax last Spring (2012) Steve too is a big fan (we even tried the stuffed grape leaves at the festival - something neither one of us had thought that we would ever do!). So when we saw that there was a recipe for Greek Salad in our new 'Cook This Not That: Easy & Awesome 350-Calorie Meals' cookbook we felt we needed to give it a try.

Unfortunately for us this dish was not delicious. It is rare that we will make a dish that we simply just do not like (and I thought that it was quite strange that I could not like a Greek Salad - it is not a difficult recipe), but I think that it was that the ingredients listed simply did not come in the appropriate ratios.

Here are all the ingredients that are suggested for this recipe:

2 cups chopped cooked chicken
1 large cucumber, peeled, seeded ad chopped
1 red bell pepper, chopped
4 Roma tomatoes, chopped
1 red onion, chopped
1/2 can garbanzo beans (we used chick peas)
3/4 cup crumbled feta
2 tbsp red wine vinegar
1 tsp dried oregano
1/4 cup olive oil
Salt and pepper to taste

Here is how the recipe suggests that you bring it all together:
  1.  Combine chicken, cucumber, pepper, tomatoes, onion, chick peas, and feta in a bowl.
  2. In a separate bowl combine vinegar and oregano with salt and pepper, slowly drizzle in olive oil and whisk to combine.
  3. Toss the dressing with the salad, let sit for 30 minutes and serve.
My thoughts on why this recipe did not taste the way it should was in large part because of the onion. Using a full red onion was just too overpowering and masked the flavours of all of the other ingredients. We are keen to try more Greek Salad recipes but are very quick to share that we will not be trying this recipe again... ever.

Friday, February 22, 2013

Red Pepper Alfredo

Anyone who knows Steve knows that he loves Alfredo sauce, so when we came across a recipe for Red Pepper Alfredo we knew that it was only a matter of time before we tried it. I should also mention that we love eating dishes that have roasted red peppers in them - so naturally this dish already had two thumbs up to us!

This recipe is from the 'Cook This Not That: Easy & Awesome 350-Calorie Meals' cookbook. As many of you may now know - many of our recipes are from this series of cookbooks. They allow us to try lots of new dishes, while keeping the recipes relatively simple and are low calories (not that we really care about the calories, but it is a good feature).

This recipe delivered on our expectations! It was delicious and of course easy to make. The only suggestion that Steve had was to add in chicken or some type of meat to make the recipe a little bit more filling.

Here are all the ingredients that you'll need for this recipe:

10 oz dried fettuccine
1 1/2 tablespoon butter
1 1/2 tablespoon flour
1 cup milk
1/2 cup half and half
3/4 cup chopped roasted red peppers
2 garlic cloves halved
1/2 cup grated Parmesan
Salt and pepper to taste

Here is how we brought it all together

  1. Bring large pot of water to a boil. Add the pasta and cook until al dente, about 30 second less than the package instructions.
  2. Meanwhile, melt the butter in a medium saucepan over medium heat. Stir in the flour and cook for a minute, until the two are fully incorporated. Slowly add the milk and half and half, whisking to prevent lumps from forming. Add the red pepper and garlic. Turn the heat to low and simmer for 10 minutes. Pour the mixture into a blender and purée until smooth and uniform in colour. Return to the pan and stir in the Parmesan. Season with salt and pepper and simmer until pasta is ready.
  3. Drain the pasta and add directly to the saucepan. Toss to coat evenly.
Steve and I both encourage you to try this recipe the next time you are looking for a new pasta dish to try! It is worth the time it takes to roast your own red pepper!

Bon appetite & enjoy!

Wednesday, February 20, 2013

Nifty Gifty!

For Christmas I was the very happy receiver of one of this year's hottest gifts - the Corkcicle!
It is the perfect gift for anyone who enjoys a bottle of white wine every now and again (which of course I do!).

If you have a wine lover in your life - you need to get them a Corkcicle for a special occasion (birthday, Valentines Day, anniversary, Christmas, etc) this year!

Enjoy!

Monday, February 18, 2013

Moroccan Salmon with Quinoa Pilaf

As we were finishing up 2012 and preparing for 2013, Steve and I were trying to move out of the turkey and chocolate coma we had been in and into a more healthy diet. So it was quite fitting that we started to look through the two new cookbooks that Steve received for Christmas. You may remember that last year for Christmas I had given Steve a cookbook called 'Cook This Not That' and it was from/connected to Men's Health Magazine. That one cookbook was used for many recipes in our home over the last year, so naturally when I saw that there were two more of these books at Chapters I had to pick them up!

In an effort to eat healthy, Steve and I decided to try something new - quinoa. Over the past few months I had heard lots of people talk about this great grain, so I figured that we should give it a shot.
The recipe we settled on was 'Moroccan Salmon with Quinoa Pilaf' (from the orange Cook This Not That 'Easy & Awesome 250-Calorie Meals' cookbook)

Here are all the ingredients that you'll need for this recipe

1 cup quinoa
1 1/4 cup chicken stock or more if needed
1/2 cup parsley
1/4 cup golden raisins (didn't use)
2 tbsp pine nuts toasted in a pan or oven for a few minutes
1 tsp salt
1/2 tsp black pepper
1/4 tsp cumin
1/8 tsp cinnamon
1/8 tsp cayenne
4 skinless salmon fillets (4-6 oz each)

Here is how we brought it all together:
  1. Preheat the oven to 350 deg F. Prepare quinoa according to package instructions, using chicken stock instead of water. Stir in the parsley, raisins, and pine nuts. Cover and keep warm.
  2.  Combine salt , black pepper, cumin, cayenne, and cinnamon and rub over salmon fillets. Place on baking sheet and bake until the fish flakes with gentler pressure from your finger, about 10-12 minutes, depending on the thickness.
  3. Serve each salmon fillet with a generous scoop of quinoa pilaf.
Steve and I LOVED this recipe! It was a delicious new take on salmon and the quinoa was a perfect side! I liked the nutty flavor of the quinoa and actually chose to add some lemon juice to mine as well - it gave it a little added kick!

You should definitely give this recipe a try - I know that we will be adding it to our short list of recipes to try to again!

Bon appetite & enjoy!

Friday, February 15, 2013

Have a Merry Morning! Bacon, Eggs & Hash Brown Cups

This year was the first year that Steve and I spent Christmas (eve, morning and day) together! And given that this would be the first of many, we wanted to create some of our own traditions - including a delicious Christmas morning breakfast. I had been looking through lots of food blogs, websites and magazines when I finally came across the perfect recipe for us in the Inspired Magazine: Bacon, Eggs and Hash Brown Cups.

For us this was the perfect recipe because it allowed us to only make as many as we would want - many Christmas morning breakfast recipes would serve 6-8 people and although we do love food, we knew that a dish that large would go to waste.

I have been very impressed with the recipes that we had tried to date from the Inspired Magazine so I felt comfortable marking this as our go-to Christmas morning tradition breakfast (no pressure!).

Here are all of the ingredients that you will need for this recipe:

Ramekins (we used three - 2 for Steve and 1 for me)
1 tablespoon melted butter
3 cups Compliments Hash Brown Fried Potatoes (thawed)
3 green onions, thinly sliced
2 Compliments Large Eggs, whites only, whisked
1/4 teaspoon salt and pepper (each)


Filling
6 slices Compliments Naturally Smoked Bacon
1 small red pepper, finely chopped
1/2 cup shredded Sensations by Compliments Aged 5 Years Canadian Cheddar Cheese
6 Compliments Large Eggs
1/4 teaspoon salt and pepper (each)

 And here is how you will bring it all together:


I also appreciated that the online recipe for this dish suggests some tips to help with the preparation:
  • Make ahead: Prepare steps 1 and 2 the night before, cover and refrigerate. Bring cups to room temperature before proceeding with step 3.
This dish was amazing and was the perfect Christmas morning breakfast! We are looking forward to making it for many more Christmases to come!


Give this recipe a try anytime you have a special occasion - it would also be great for brunch!


Bon appetite & enjoy!

Monday, February 11, 2013

Oriental Pork & Vegetables

Over the holidays Steve and I spent some time setting up our new home office, which included putting all of our cookbooks and cooking magazines away on our new bookshelves. While we will putting everything away, we noticed that there were several cookbooks which we had not used in awhile and decided to take another look through them for new recipe ideas. It was in the 'Better Homes and Gardens: every meal easy' cookbook that we found the 'Oriental Pork & Vegetable' recipe.

The recipe itself was very simple, just as the name of the book would suggest; but in my opinion it lacked flavor and was a little too boring for my style of cooking. There was nothing new or exciting about this recipe - but it is indeed easy.

Here are the ingredients that you will need for this recipe:

6 ounces rice stick noodles or two 3 ounce packages ramen noodles (any flavor)
2 teaspoons sesame oil or olive oil
1 16 ounce package frozen stir fry vegetables (we used fresh peppers)
1 12 ounce pork tenderloin, cut into 1/4 inch thick slices
1/4 cup teriyaki sauce
2 tablespoons plum sauce

And here is how you will bring it all together:
  1. Discard spice packet from ramen noodles, if using, or save for another use. Prepare noodles as directed on package. Set aside and keep warm.
  2. Heat a very large nonstick skillet over medium-high heat. Add 1 teaspoon of the sesame oil. Cook and stir vegetables for 4-6 minutes or until crisp and tender. Remove from skillet. Set aside and keep warm.
  3. Add remaining oil to skillet. Add pork and cook over medium-high heat for 4-6 minutes or until no longer pink, turning slices once. Stir in vegetables (drained if necessary), teriyaki sauce and plum sauce; heat through. Toss with noodles. Makes four servings. 
I would only suggest that you try this recipe if you are looking for a very very very easy recipe to try and you only have a very small amount of time. There is some flavour in the recipe - but I suggest that you add in some additional spices to kick it up a notch.

Bon appetite & enjoy!

Friday, February 8, 2013

Beef & Bulgur Pitas

Through the evolution of our food blog and our desire to expand our tastes, Steve and I have tried many new foods, that we most likely would not have if it were not for this blog. And I am glad to say that we have now both tried bulgur and are very glad that we did!

As you may know, Steve and I are big fans of the show 'Best Recipes Ever' on CBC. Back in December we were watching the show when a recipe for 'Beef and Bulgur Pitas' came on. We had both heard of bulgur before, but had never tried it. We were intrigued by the recipe because the show's host assured those watching that it was a simple recipe and a great way to introduce a new grain to our diet - so naturally we had to try it! So we bookmarked the recipe online and then added it to our weekly supper list.

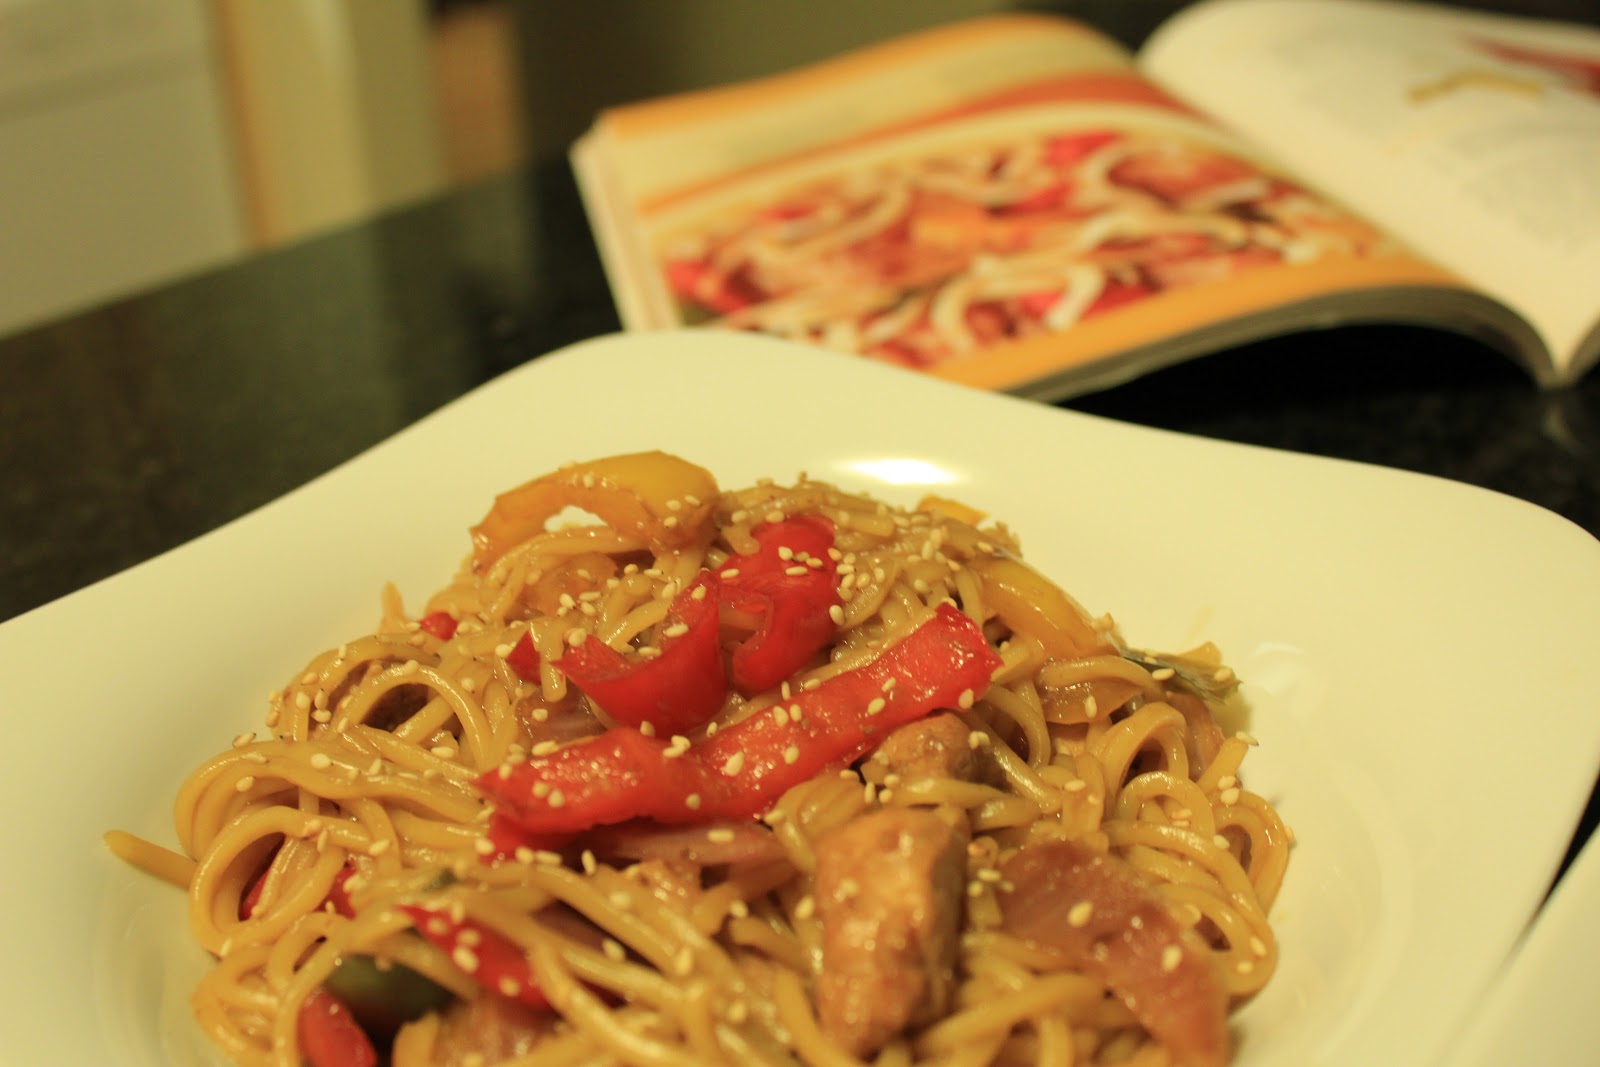
We were not as impressed with the recipe as we had hoped we would be. But we did think that it was lacking in sauce. At the time we added sour cream (that is the sauce that you will see in the photos) to help with this problem but it just did not quite fix the issue. So I am glad to see that the online ingredients and recipe for this dish now include a yogurt sauce - I think that that would have made a huge difference for us. And will now lead us to try this recipe (now modified) again!

One of the handy tips that I did learn from the show's host was how to reinforce your pita - you just cut off the top third off each pita and then place it inside each bottom of the pita! This is great advice for this recipe and all future pita recipes!

Here are all of the ingredients that you will need for this recipe:

1/2 cup (125 mL) bulgur, medium or coarse
8 oz (227 g) extra-lean ground beef
1 carrot, grated
1 zucchini, grated
1 onion, chopped
2 cloves garlic, minced
1 tbsp (15 mL) chili powder
1 tsp (5 mL) ground cumin
1/4 tsp (1 mL) pepper
1 cup (250 mL) no-salt-added tomato juice
1/2 cup (125 mL) fresh coriander or parsley, chopped
2 tsp (10 mL) lime juice
4 whole wheat pita pockets
4 leaves leaf lettuce
16 slices English cucumber
16 cherry tomatoes, halved
1/4 cup (60 mL) low-fat plain yogurt

And here is how you will bring it all together:
  1. In saucepan, bring 3/4 cup (175 mL) water to boil; stir in bulgur. Reduce heat to low; cover and simmer until no liquid remains, about 10 minutes.
  2.  Meanwhile, in nonstick skillet, sauté beef over medium-high heat, breaking up with spoon, until no longer pink, about 5 minutes. Drain off any fat from pan.
  3. Add carrot, zucchini, onion, garlic, chili powder, cumin and pepper; cook over medium heat, stirring occasionally, until onion is tender, about 5 minutes. Add tomato juice and bring to boil; reduce heat and simmer until liquid is almost evaporated, about 5 minutes. Stir in bulgur, 1/4 cup (50 mL) of the coriander and lime juice.
  4. Cut top third off each pita; place inside each bottom. Line each with lettuce leaf and some of the cucumber. Spoon in beef mixture; top with tomatoes, remaining cucumber, yogurt and remaining coriander.
This is a recipe that we are going to definitely try again - and we encourage you to try it too!
We will also be looking for lots of other bulgur recipes, given that we have lots and lots of bulgur left!

Bon appetite & enjoy!

Monday, February 4, 2013

Turkey Breast Stuffed with Curry & Gouda

Leading into Christmas and the holidays (which now feels like forever ago), Steve and I wanted to try a few turkey recipes that were more than just the traditional Christmas dinner way to prepare turkey. So it was perfect timing when we came across a recipe in the 'All You Need is Cheese' magazine that gets delivered every few months to our home.

The recipe, Turkey Breast Stuffed with Curry and Gouda, peeked our interest because neither one of us had ever prepared a turkey breast - only chicken breasts. But we were up for the challenge - especially because the recipe included curry and gouda - two things we both love!

I enjoy flipping through the 'All You Need is Cheese' magazine and then looking at the recipes online because of the helpful videos and for the nutritional information breakdown. Now that Steve and I are almost one year into the blog and have really developed a deep passion for cooking - we both appreciate any helpful hints and tips we can pick up along the way!

The recipe itself was not too difficult. We were both surprised at how large one turkey breast was!It fed us for days! And the only change that we made to the recipe was that we did not make the cranberry sauce - simply because we are not big cranberry fans. I was however, slightly disappointed that the end product was not juicer, it was actually quite dry - but there was lots of flavour!

Here are all of the ingredients that you will need for this recipe:

1 tbsp (15 ml) butter
1 onion, chopped
2 garlic cloves, chopped
1 cup (250 ml) apple, peeled and diced
1/2 tbsp (7 ml) curry powder
1 slice of bread, cut into cubes
Salt and freshly ground pepper
1 boneless turkey breast, about 2 lb (1 kg)
1 1/4 cups (310 ml) Canadian Gouda, diced
1 tbsp (15 ml) butter, melted

Cranberry sauce:
1 tbsp (15 ml) butter
2 cups (500 ml) fresh or frozen cranberries
1/4 cup (60 ml) sugar
1/2 cup (250 ml) chicken or beef broth
Salt and freshly ground pepper
 
 
And here is how you will bring it all together:
  1. Preheat oven to 425°F (220°C).
  2. In a skillet, melt butter on medium-high heat and cook onion, garlic and diced apple for 5 minutes.
  3. Remove from heat, add curry powder and bread cubes, and season. Mix well and let cool.
  4. Cut turkey breast in half through its thickness (without cutting through all the way, so as to be able to open it up like a book).
  5. Add Gouda to cooled apple and curry mixture.
  6. Spread bottom half of turkey breast with mixture, then close up the two halves and hold in place with toothpicks.
  7. Place in an oven-safe dish, brush top with melted butter, season and bake in oven for 15–20 minutes. Reduce heat to 350°F (180°C) and cook for 1 more hour.
  8. In a saucepan, melt butter and cook cranberries for 5 minutes.
  9. Add sugar and cook another 2 minutes, then deglaze with red wine and reduce by half.
  10. Add broth and leave cranberries on heat 7–10 minutes until cooked and the broth thickens. Season and serve with the stuffed turkey.
I would definitely like to try this recipe again and would appreciate any insight folks may have into how I can make the turkey juicer!
 
Bon appetite & enjoy!